I Just Had An Emergency C-section - What Should I Do?
So you weren't planning on a C-section, but life had other plans, and now you're recovering from an emergency C-section. What now?
First off, you've got this! You may have a lot of feelings about missing out on your planned birth experience, and that's OK. Second, C-section recovery is very different than vaginal birth recovery—after all, you just had a major surgery! Here's what you should do during the first few weeks after an emergency C-section.
Control the Inflammation
You'll want to do everything you can to prevent inflammation around your C-section incision. Decreasing inflammation helps avoid scar tissue buildup that can lead to pain and future pregnancy complications. Following R.I.C.E. (Rest, Ice, Compression, and Elevation) is the best way to help ease inflammation after a C-section.
Rest your body
Remember that you're worthy of rest! If you enjoy being a "productive" person, this can be a hard pill to swallow. Take it easy on yourself. You just gave birth and had major surgery!
Ice you incision
Icing your incision helps keep the inflammation down and reduces pain and swelling. Put an ice pack directly over the incision dressing or a clean towel. In the hospital, you want to ice your incision every 2 hours. Hit the call light and ask for a fresh ice bag when needed. If you've mastered walking down the hallway and want to move, you can refill your own ice and return to your room.
Once you're home, you'll want to ice your incision four or more times a day for 15 minutes at a time. Ideally, you want to keep icing for 5 weeks.
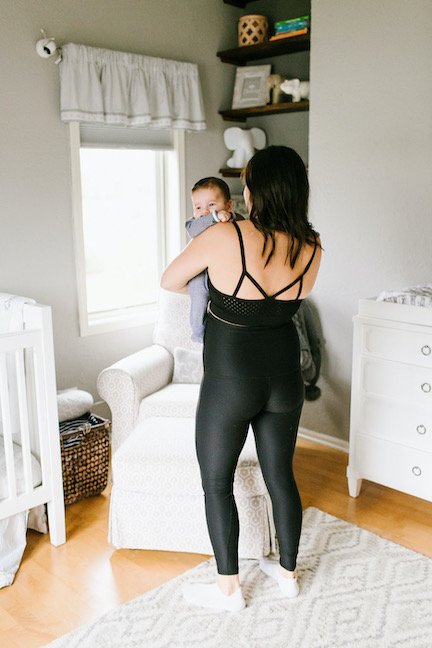
These are our favorite compression leggings - the Postpartum Recovery Leggings from Love Steady.
Compression garments/abdominal binders (and the boot!)
Wearing compression garments/abdominal binders helps expedite healing by decreasing inflammation. Without compression, you can get pockets of swelling in your abdominals. C-section underwear is also important because, unlike regular underwear, it won't hit your scar. You can wear compression garments over your C-section incision in the hospital. Your hospital can also provide you an abdominal binder.
TIP: You want a compression garment with light to medium compression and some elasticity—so you can breathe! You'll only wear the garment for the first 2-4 weeks. We're not fans of wearing compression garments for the long term.
At the hospital, there's also this pneumatic boot at the end of your bed. You'll want to use the boot every time you're in bed! This device helps increase circulation and decrease your risk of blood clots. When you are up and moving, your calf muscles help pump blood back to your heart. The boot helps keep your blood flowing when you can't move around.
Your techs, nurses, or partner can help you put the boot on. The nurses have a lot going on and will sometimes forget. You are responsible for asking for help and ensuring the boot is on when you get in bed.
Elevation and walking
You may not feel like getting out of bed after a C-section, but early mobility within the first 6 to 8 hours is key! Moving helps prevent complications that can follow a major surgery. Walking after a C-section helps:
Promote lung function to prevent pneumonia
Decrease your risk of blood clots
Improve digestion and get your bowels moving to help avoid constipation
Pump blood by bringing in healthy new cells and removing inflammatory cells
Walking is a gentle movement that creates little tugs, encouraging early remodeling (healing) of the scar. Movement in and around your scar is important because it prevents scar tissue buildup and the scar from adhering to deeper tissues. Our bodies also need motion to create the blood circulation necessary for healing. These are the reasons why we don't advocate for complete rest!
NOTE: There should be a progression back to activity as you heal. It doesn't take long to lose our capacity for movement. Just make sure you don't overdo it during the acute healing phase.
Move Smarter
During C-section recovery, you'll want to engage your core as little as possible. This can make getting out of bed a little tricky. Instead of sitting straight up, you'll want to start log rolling—which involves simultaneously rolling your upper and lower body. Here's how log rolling works.
Getting IN bed
Move the bed up higher at the hospital so your butt doesn't have far to fall. Before you sit in the bed, think about where you want your hips/pelvis to end up. If you put them in the right spot, there's less moving! To determine where to sit, divide the bed into thirds and sit at the top 1/3 of your bed.
Now, sit on the bed and lower your hospital bed so your knees have more of a bend in them. Scoot back onto the bed as far as you can by pressing into the hospital bed with your arms and leaning a little forward with your trunk—you want to avoid sitting at the very edge of your bed.
NOW timber! Move slowly and keep your spine straight. Lower yourself onto your side using your forearm. Your forearm should be under your shoulder. Simultaneously lower yourself down and bring your legs up to the bed.
Keeping your knees bent, slowly roll onto your back. Your shoulders, hips, and knees should always stay aligned.
Getting OUT of bed
At the hospital, move your bed up again. Bend your knees while lying on your back. To initiate rolling to your side, reach your arm opposite the side you want to roll toward the bed's railing. As you start to reach, move your hips, shoulders, and knees simultaneously so you roll onto your side. Imagine you have a dowel on the back of your head and pelvis. Keep one straight line. The less twisting or rotation, the less abdominal activation.
Your bottom arm should be underneath you, and your top arm should be at your side.
Take your top hand and place it on the railing. You will then push through that hand. This will press your body to a sitting position. Bring your heel and shin off the bed.
Begin pushing through the railing and lower your legs as you slowly raise your body to a sitting position.
Getting IN and OUT of a chair
In the hospital, I liked to sit up and feed from a chair instead of the hospital bed the entire time. Make the appropriate choice when sitting in a chair: you want to sit in a chair that is hard, has arms, and is not too low or deep.
Scoot to the edge of your seat.
Contract transverse abdominis and pelvic floor. Hinge from the hips with a straight spine and lean FAR forward. Think "nose over toes." The more you can shift your weight forward (off your butt), the easier it will be for you to get up.
Maintain a neutral lumbar spine (low back). Then, press through your feet while using your leg muscles to stand. Choose a chair with arms when possible and push from those as well (if you aren't holding a baby).
NOTE: When getting up is difficult, it can be tempting to hold your breath when exerting yourself. But getting out of a chair is exerting yourself after a C-section! As you move, think of the phrase "blow as you go" to remind yourself to exhale through your mouth. Breathing will help you avoid excessive and unnecessary increases in intra-abdominal pressure—which are created by holding your breath.
Movement Freebie
Desensitization
Women often experience sensitive or numb skin around the surgical area, which can be uncomfortable to touch. We are passionate about helping you to regrow and regain sensation in this area. Working on your scar tissue desensitization daily (or twice a day if you can) after your C-section will help to bring back awareness and feeling to the incision area.
How to desensitize your scar
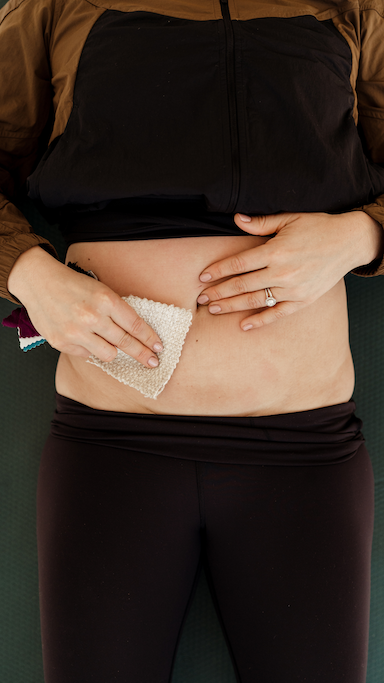
Starting 1 week after your C-section, you can begin working on desensitizing your C-section scar. Grab your texture kit and choose any of the fabric materials.
Using that fabric, rub the skin around the incision area for 1 minute (1 inch away from the incision on all sides).
Repeat using the rest of the fabrics on the ring (twice a day if possible).
After 4 weeks, you can move over the scar itself with the textures. Repeat the same steps as above. It might feel funny or "weird" at first, but this is OK! These sensations mean you're slightly irritating the nerve, encouraging it to heal faster.
TIP: I often did this while snuggling my babies or watching TV. It doesn't have to feel like another "to do" during an already busy time!
C-Section Recovery Box
Let our C-Section Recovery Box help take the guesswork out of your initial recovery with our 10 week recovery checklist that covers everything from movement to caring for your incision and scar.
The box includes:
Educational sheet + recovery checklist
E + E fabric kit (C-section desensitization kit)
Peri bottle
Scar adhesive strips + kinesio tape
1/2 foam roller
Ice pack
Sources
Gilbert I, et al. (2022). Exploring the Effects of Standardized Soft Tissue Mobilization on the Viscoelastic Properties, Pressure Pain Thresholds, and Tactile Pressure Thresholds of the Cesarean Section Scar. https://pubmed.ncbi.nlm.nih.gov/35426735/
Hattori K, et al. (2018). Preoperative Six-Minute Walk Distance is Associated with Pneumonia After Lung Resection. https://academic.oup.com/icvts/article/26/2/277/4237496
Karaca I, et al. (2019). Influence of Abdominal Binder Usage after Cesarean Delivery on Postoperative Mobilization, Pain and Distress: A Randomized Controlled Trial. https://www.ncbi.nlm.nih.gov/pmc/articles/PMC6812913/
MedlinePlus. (2022). After a C-section - In the Hospital. https://medlineplus.gov/ency/patientinstructions/000620.htm
Stupak A, et al. (2021). Scar Tissue after a Cesarean Section-The Management of Different Complications in Pregnant Women. https://www.ncbi.nlm.nih.gov/pmc/articles/PMC8620716/
Suwannalert P, et al. (2021). Effect of Applying Cold Gel Pack on Reduction of Postoperative Pain in Cesarean Section, Low Midline Skin Incision: A Randomized Controlled Trial. https://obgyn.onlinelibrary.wiley.com/doi/abs/10.1111/jog.14855


